
2. Virtualization#
2.1. Course Topics#
Introduction to operating system virtualization
Modern virtualization types
Kernel-based Virtual Machine (KVM) virtualization
Virtual Machine CLI management tool:
virshVirtual Machine deployment
Virtual Machine cloning
Virtual drive access and recovery
Virtual Machine disk resizing
Virtual Machine removal
Cloud image deployment and customization
2.2. References#
KVM and QEMU Integration Guide: Explains how the KVM kernel module and QEMU work together for hardware-accelerated virtualization.
2.3. Prerequisites for Practical Exercises#
Create a working directory named KVM and navigate into it:
mkdir KVM
cd KVM
Download the kvm1 VM archive and the Rocky Linux 10 cloud image:
wget http://capone.rutgers.edu/coursefiles/kvm1.tgz
wget https://dl.rockylinux.org/pub/rocky/10/images/x86_64/Rocky-10-GenericCloud-Base.latest.x86_64.qcow2
2.4. What is Virtualization?#
+-------------------------------------------------------------------+
|  Virtual Machine 1   |  Virtual Machine 2   |  VM 3   |   VM 4    |
|  (Guest OS / Apps)   |  (Guest OS / Apps)   | (Guest) |  (Guest)  |
+-------------------------------------------------------------------+
|              Hypervisor / Virtualization Layer                    |
+-------------------------------------------------------------------+
|                   Physical Hardware                               |
|              (CPU, RAM, Storage, Network)                         |
+-------------------------------------------------------------------+
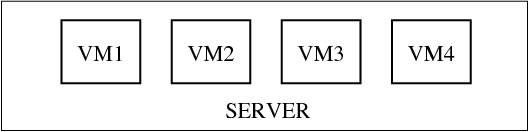
Accessible Image Description:
Overview: An architectural diagram showing how a hypervisor layer abstracts physical host hardware to run multiple isolated virtual machines simultaneously.
Setup: The baseline consists of physical hardware components (CPU, RAM, Storage, Network Interface). Above the hardware is the Hypervisor/Virtualization Layer. Sitting on top are individual Virtual Machines (VM 1, VM 2, VM 3, VM 4), each operating with its own independent Guest OS and application stack.
Key Takeaways: Virtualization decouples software environments from physical hardware, enabling concurrent, isolated execution of multiple operating systems on a single physical host.
In computing, virtualization is a technology that allows multiple operating systems (Virtual Machines or VMs) to run simultaneously, safely, and efficiently on a single computer system.
2.4.1. Primary Purposes of Virtualization#
Application Development & Testing: Isolating environments from the host system.
Server Consolidation: Combining multiple virtual workloads onto a single physical server platform.
Virtual Appliances: Distributing pre-configured VMs for specific applications or services.
Prototyping & Cloud Staging: Building local VMs and migrating them to remote cloud providers.
Multi-OS Desktop Workflows: Running alternate operating systems alongside a primary host OS.
2.5. OpenStack Computational Cloud: JetStream 2#
+---------------------------------------------------------+
|                 JetStream 2 Cloud Cluster               |
+---------------------------------------------------------+
|  +--------------------------------------------------+   |
|  |             OpenStack Management Layer           |   |
|  +--------------------------------------------------+   |
|  | Compute Node 1 | Compute Node 2 | Compute Node N |   |
|  | (Ubuntu Host)  | (Ubuntu Host)  | (Ubuntu Host)  |   |
|  |  +-----------+  |  +-----------+  |  +-----------+   |
|  |  | KVM VMs   |  |  | KVM VMs   |  |  | KVM VMs   |   |
|  |  +-----------+  |  +-----------+  |  +-----------+   |
|  +--------------------------------------------------+   |
|  |                Physical Server Racks             |   |
+---------------------------------------------------------+
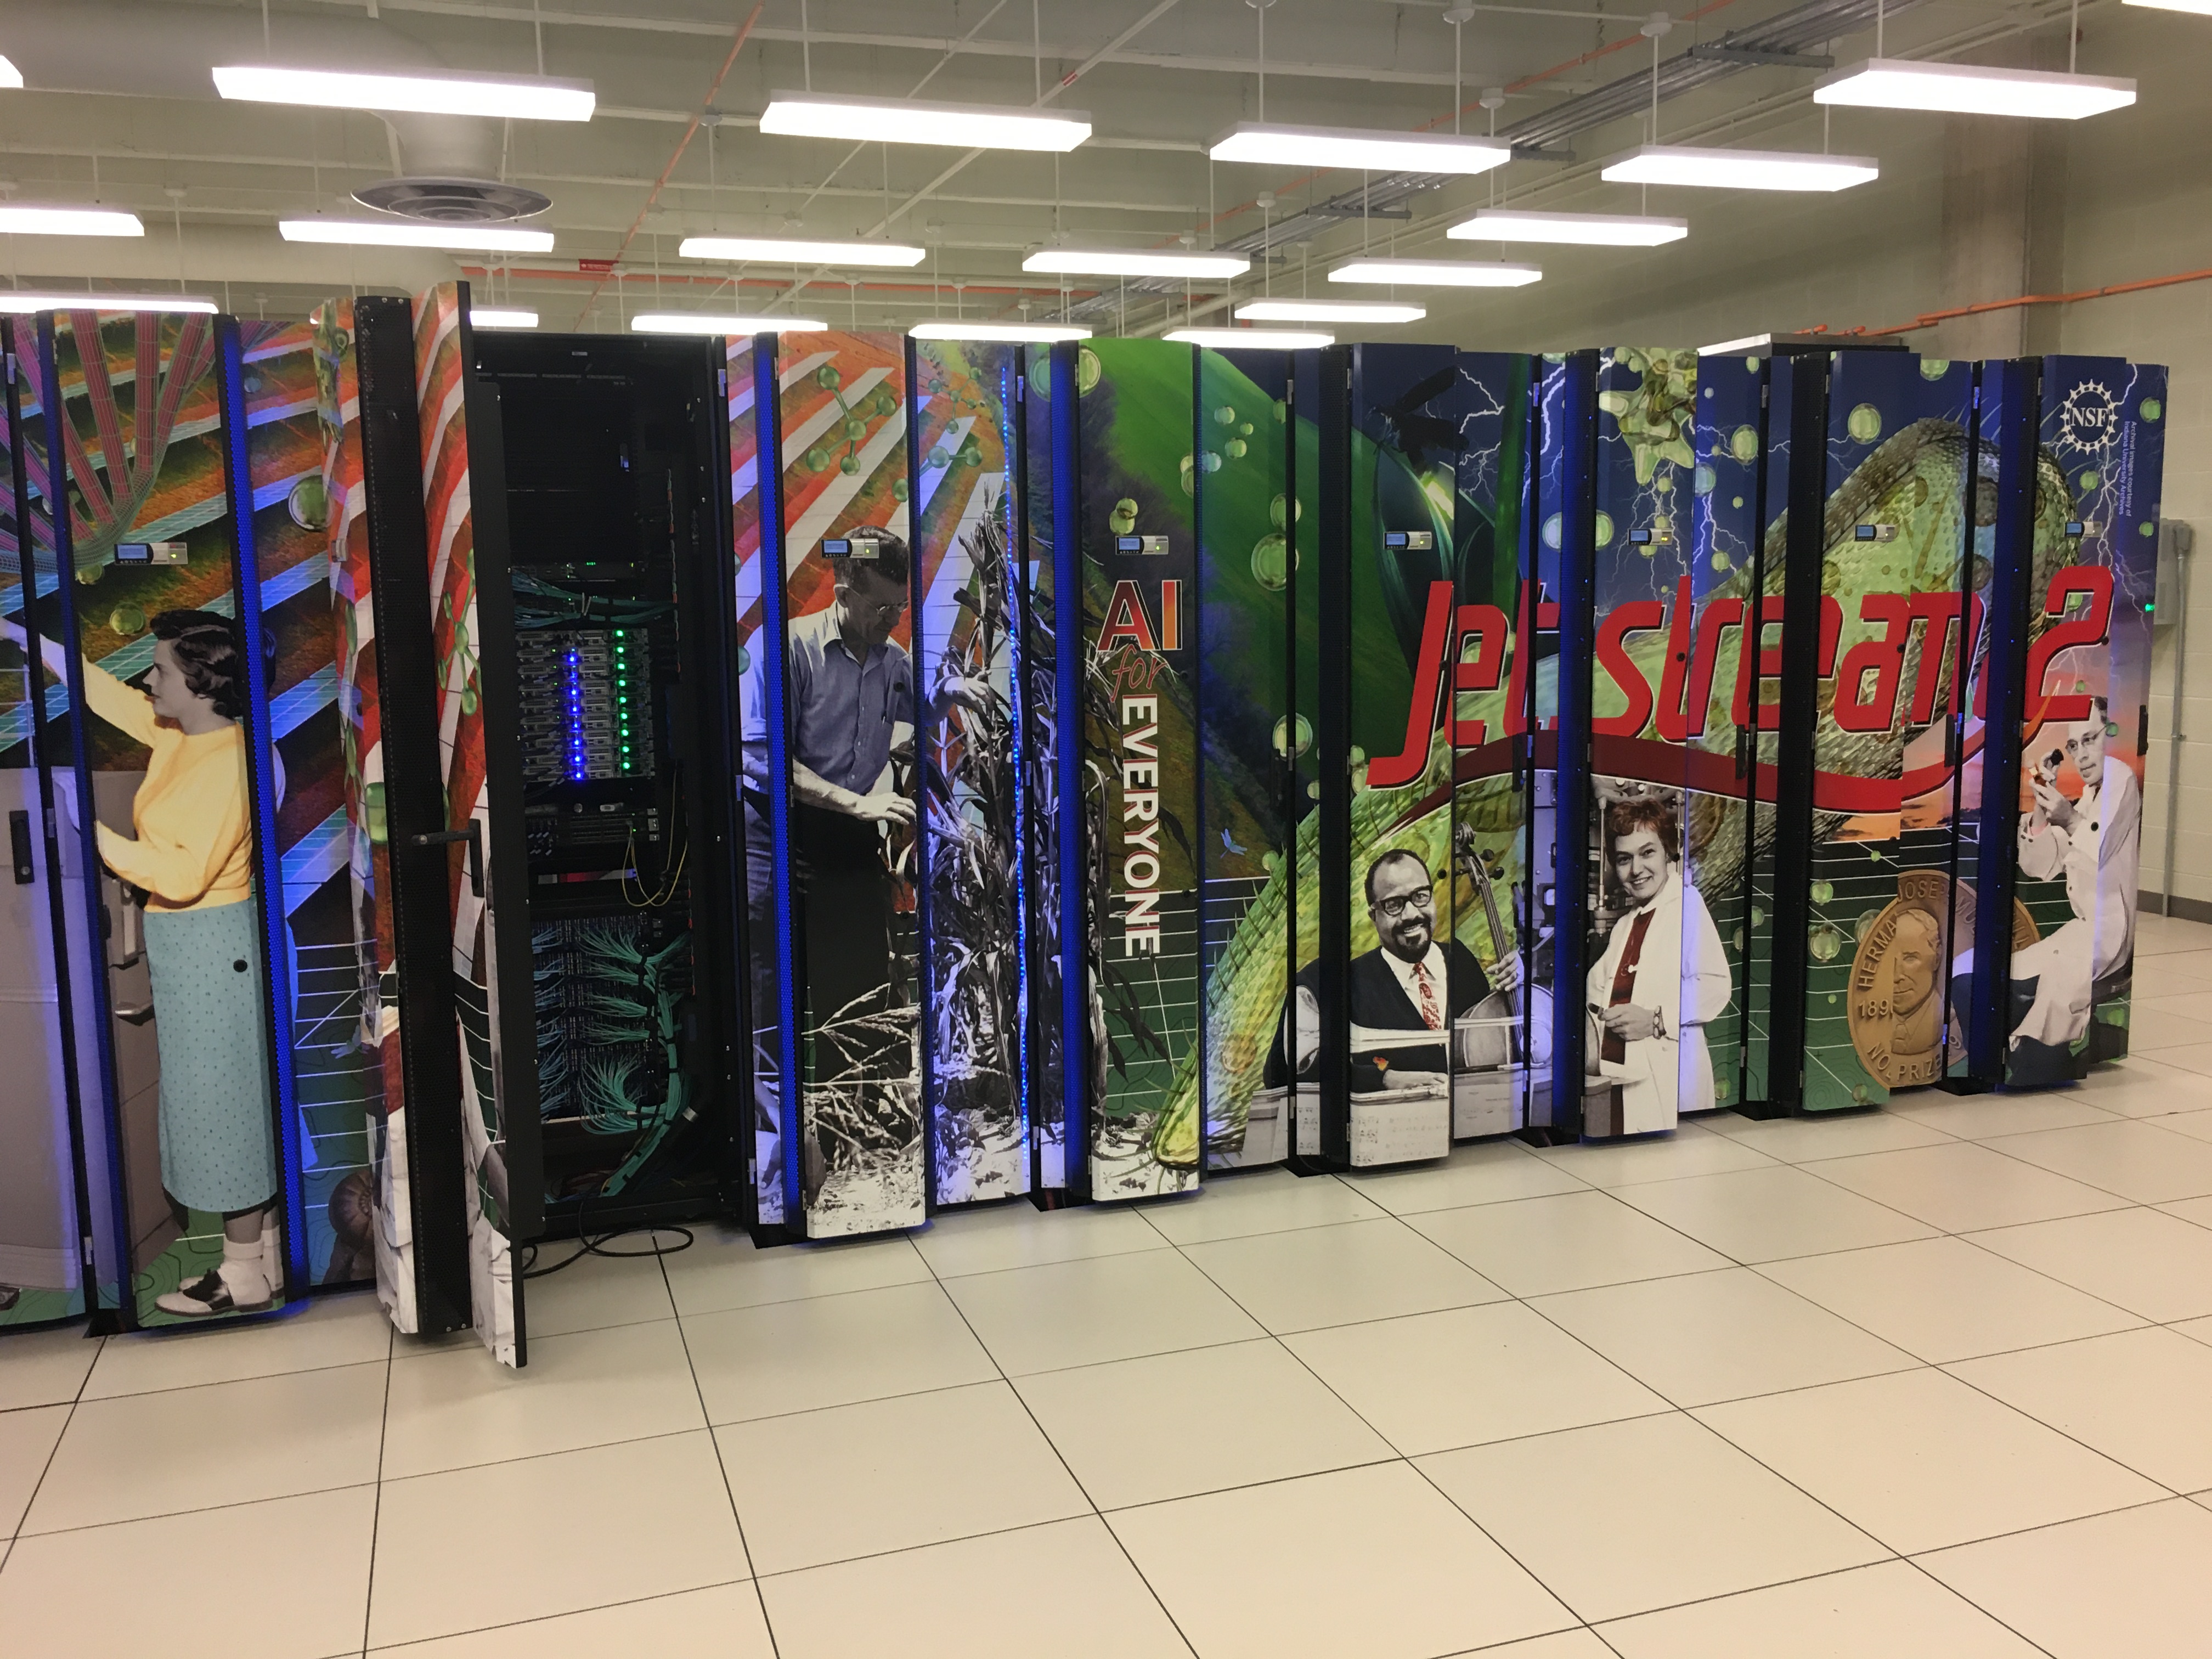
Accessible Image Description:
Overview: A photograph showing rows of physical rack-mounted server hardware that power the JetStream 2 cloud computing infrastructure at Indiana University.
Setup: High-density enterprise server racks contain multiple compute nodes. Each compute node runs an Ubuntu host operating system using KVM hypervisors, orchestrated centrally by OpenStack.
Key Takeaways: Illustrates production enterprise hardware configured to host large-scale, virtualized compute workloads for scientific research and cloud applications.
2.6. Virtualization Challenges and Hardware Solutions#
Virtualization requires physical resources—CPU, RAM, and I/O devices—to be shared securely among multiple virtual machines. The traditional x86 architecture was not originally built to support full hardware virtualization. Modern processor technologies overcome these legacy limitations:
CPU Virtualization:
Challenge: Managing privileged CPU instructions (Ring 0 access across multiple guest kernels).
Solutions: Binary translation/emulation and hardware-assisted virtualization.
Memory Virtualization:
Challenge: Safely partitioning physical system memory and dynamically allocating non-contiguous physical pages to virtual machines.
Solution: Two distinct translations: Guest Virtual Address (GVA) to Guest Physical Address (GPA) (managed entirely by the guest OS page tables) and Guest Physical Address (GPA) to Host Physical Address (HPA) (managed by the hypervisor to isolate and map actual hardware RAM).
Device and I/O Virtualization:
Challenge: Routing input/output requests cleanly between virtual device controllers and shared physical hardware adapters.
Solution: SR-IOV (Single Root I/O Virtualization) allows a single physical PCIe device to present itself as multiple separate virtual functions directly to guest VMs.
GPU/Video Virtualization:
Challenge: Concurrent video output from multiple VMs through one GPU.
Solution: Direct GPU passthrough using IOMMU, vGPU, or MIG (Multi-Instance GPU) technology to assign dedicated hardware graphics slices to VMs.
2.7. Common Virtualization Types on the x86 Platform#
Operating System-Level Virtualization (Containers):
The system runs a single shared operating system kernel. Applications run inside isolated user-space environments (containers).
Examples: Solaris Zones, LXC, Docker, Podman.
Hardware Emulation (Full Virtualization):
A hypervisor completely emulates a physical hardware environment, translating guest system calls into host execution calls for unmodified guest OSs.
Examples: VMware Workstation/Player, VirtualBox, QEMU (in emulation mode).
Hardware-Assisted Virtualization:
Uses dedicated CPU hardware extensions (such as
Intel VT-xorAMD-V) to execute guest code directly on the host processor with hypervisor privilege traps.Examples: KVM, VirtualBox, VMware ESXi, Microsoft Hyper-V.
Note: Proxmox VE is a popular Debian-based hypervisor platform that combines KVM hardware-assisted virtualization and LXC container management under a single administrative interface.
2.8. Virtualization with KVM#
QEMU alone: Provides full hardware emulation and software system-call trapping.
QEMU + KVM: Combines QEMU user-space device handling with the Linux kernel’s KVM module (
kvm.ko) to deliver near-native CPU execution speeds usingIntel VT-xorAMD-Vextensions.
+-------------------------------------------------------+
|                   User Space / Guest                  |
|  +-------------------------------------------------+  |
|  |               QEMU Process (User Mode)          |  |
|  |     (Emulates I/O devices, PC hardware, BIOS)   |  |
|  +-------------------------------------------------+  |
+-------------------------------------------------------+
|                   Host Linux Kernel                   |
|  +-------------------------------------------------+  |
|  |                   /dev/kvm                      |  |
|  |            KVM Kernel Module (kvm.ko)           |  |
|  |      (Schedules guest CPU execution via VT-x)   |  |
|  +-------------------------------------------------+  |
+-------------------------------------------------------+
|           Hardware (CPU with Intel VT-x / AMD-V)      |
+-------------------------------------------------------+
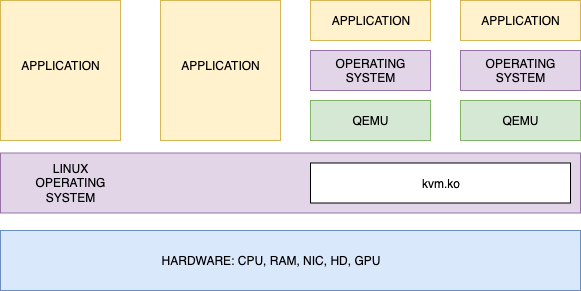
Accessible Image Description:
Overview: An architectural diagram showing the layered relationship between user-space QEMU processes, the KVM Linux kernel module, and physical x86 CPU hardware extensions.
Setup: The architectural stack consists of three main tiers: User Space (where QEMU handles virtual machine creation, device emulation, and virtual storage/network calls), Host Kernel Space (where
/dev/kvmandkvm.koschedule guest thread execution directly on CPU hardware), and Physical Hardware (x86 CPU equipped with Intel VT-x or AMD-V extensions).Key Takeaways: KVM turns the Linux kernel into a bare-metal hypervisor, allowing QEMU to offload core CPU and RAM execution to native physical hardware for maximum performance.
2.8.1. Core Virtual Machine Files#
A standard KVM virtual machine consists of two primary files:
XML Configuration File: Defines virtual hardware parameters (located at
/etc/libvirt/qemu/vm.xml).Disk Image File: Holds the guest OS filesystems (typically stored at
/var/lib/libvirt/images/vm.qcow2).
2.8.2. Hardware Support Verification#
To verify if your CPU processor supports hardware virtualization:
egrep -c '(vmx|svm)' /proc/cpuinfo
Output
0: CPU lacks hardware virtualization support.Output
1or greater: CPU supports hardware virtualization extensions (ensure hardware virtualization is enabled in system BIOS/UEFI settings).
To verify if hardware virtualization is active in BIOS/UEFI:
sudo apt update
sudo apt install cpu-checker
kvm-ok
If output reads:
INFO: Your CPU supports KVM extensions
INFO: KVM is disabled by your BIOS
Action: Reboot into BIOS settings and enable Intel Virtualization Technology (VT-x) or AMD-V.
If output reads:
INFO: Your CPU supports KVM extensions
INFO: /dev/kvm exists
KVM acceleration can be used
Action: System is fully configured and ready to run accelerated VMs.
2.9. KVM Setup (Hands-On Exercise)#
Open a system shell and switch to root:
sudo -s
apt update
apt install virt-manager
Fix permissions on the default VM storage directory:
chown hostadm:hostadm /var/lib/libvirt/images
Add user
hostadmto the administrativelibvirtgroups:usermod -a -G libvirt hostadm usermod -a -G libvirt-qemu hostadm
Install additional KVM packages:
apt install qemu-kvm qemu-system
Restart the
libvirtdservice daemon:systemctl restart libvirtd
Log out of your desktop session and log back in to finalize group membership updates.
2.10. Command Line Interface Management with virsh#
The virsh utility is a command-line interface alternative to the graphical virt-manager software. Both tools rely on the underlying libvirt API framework.
To display all running VMs on the system default hypervisor connection:
virsh -c qemu:///system list
2.10.1. Setting Default Connection URI#
To avoid appending -c qemu:///system to every command, configure the LIBVIRT_DEFAULT_URI environment variable.
Edit ~/.bashrc for user hostadm and add this line at the bottom:
export LIBVIRT_DEFAULT_URI='qemu:///system'
Apply the environment update:
source ~/.bashrc
2.10.2. Enabling Default Virtual Network#
Enable and start the default libvirt network:
virsh net-autostart default
virsh net-start default
Verify virtual network operational status:
virsh net-list --all
2.11. Deploying an Ubuntu 26.04 Virtual Appliance#
Navigate to your working directory and download the
kvm1appliance tarball (if not previously downloaded):cd KVM wget http://capone.rutgers.edu/coursefiles/kvm1.tgz
Extract the archive contents:
tar -zxvf kvm1.tgz
Place configuration and disk files into system directories and adjust ownership settings:
sudo cp kvm1.xml /etc/libvirt/qemu/
sudo mv kvm1.qcow2 /var/lib/libvirt/images/
sudo chown hostadm:hostadm /etc/libvirt/qemu/kvm1.xml
sudo chown hostadm:hostadm /var/lib/libvirt/images/kvm1.qcow2
Remove the tarball archive to free up disk space:
rm kvm1.tgzRegister the new VM XML definition with KVM:
sudo virsh define /etc/libvirt/qemu/kvm1.xml
Start the virtual machine:
virsh start kvm1
Connect to the virtual console:
virsh console kvm1
Login credentials: Username
hostadm, Passwordunisys.Perform a clean virtual machine shutdown from within the guest console:
shutdown -h now
2.12. Essential virsh Control Commands#
List active VMs:
virsh listList all registered VMs (active and inactive):
virsh list --all
Start a defined VM (
kvm1):virsh start kvm1
Gracefully shut down a VM (
kvm1):virsh shutdown kvm1
Get the IP address assigned to a running VM:
virsh domifaddr kvm1
Access guest serial console:
virsh console kvm1
Escape/Exit guest serial console back to host shell: Press key sequence:
Ctrl + ](or^]).
2.13. Cloning Virtual Machines with virt-clone#
Clone existing VM
kvm1to a new target namedkvm3:virt-clone -o kvm1 -n kvm3 -f /home/hostadm/KVM/kvm3.qcow2
Verify registration, boot the cloned instance, and open its console session:
virsh list --all
virsh start kvm3
virsh console kvm3
Troubleshooting Permission Errors: If starting
kvm3displays:error: Failed to start domain 'kvm3' error: Cannot access storage file '/home/hostadm/KVM/kvm3.qcow2' (as uid:64055, gid:64055): Permission denied
Grant access permissions to directory
/home/hostadm:sudo chmod 755 /home/hostadm
Update guest Hostname inside
kvm3: Log in ashostadm, gain root privileges (sudo -s), edit/etc/hostname, and changekvm1tokvm3.Reset System Machine ID on
kvm3:./vm_id_reset.sh
Reboot
kvm3:reboot
2.14. Accessing and Mounting Virtual Disk Files Offline#
If a VM experiences boot failures, you can mount its underlying qcow2 virtual disk directly on the host to examine system logs and repair configuration files.
Shut down target VM
kvm3:virsh shutdown kvm3
Load host Network Block Device (
nbd) kernel module:sudo -s cd KVM modprobe nbd max_part=2 qemu-nbd --connect=/dev/nbd0 /home/hostadm/KVM/kvm3.qcow2
Create a local mount directory:
mkdir -p /mnt/vm
List partitions mapped onto device
/dev/nbd0:fdisk -l /dev/nbd0
Mount target Linux filesystem partition (e.g.,
/dev/nbd0p1):mount /dev/nbd0p1 /mnt/vm
Inspect/modify files on the virtual disk:
cd /mnt/vm
ls -la
cat etc/hostname
Safely unmount filesystem and disconnect block device:
cd
umount /mnt/vm
qemu-nbd --disconnect /dev/nbd0
2.15. Expanding Virtual Machine Disk Capacity#
Expanding guest disk space involves three sequential steps:
Increase physical capacity of the host
.qcow2image file.Expand partition table boundaries inside the virtual machine.
Resize internal guest filesystem structures.
2.15.1. Step 1: Expand Virtual Disk File Size#
Install
libguestfs-toolson the host system:sudo apt install libguestfs-tools
Ensure
kvm3is completely powered down:virsh shutdown kvm3
Inspect current image capacity and structural information:
qemu-img info KVM/kvm3.qcow2
sudo virt-filesystems --long -h --all -a KVM/kvm3.qcow2
Resize virtual disk image to 10 GB:
qemu-img resize KVM/kvm3.qcow2 10G
Verify updated virtual disk size:
qemu-img info KVM/kvm3.qcow2
2.15.2. Step 2: Grow Partition and Filesystem inside Guest OS#
Start
kvm3and connect to guest console:virsh start kvm3 virsh console kvm3
Inspect current block device geometry:
lsblk
Check existing filesystem space utilization:
df -hInstall guest cloud partitioning tools inside guest OS:
sudo apt install cloud-guest-utils
Expand target root partition boundary (e.g., partition
1on/dev/vda):sudo growpart /dev/vda 1
Resize filesystem (
ext4format):sudo resize2fs /dev/vda1
Note: The
resize2fscommand specifically targetsext4/ext3filesystems. Forxfsfilesystems (commonly used in Red Hat/Rocky distributions), usexfs_growfsinstead.Verify expanded filesystem capacity:
df -h
2.16. Deleting a Virtual Machine#
Ensure VM
kvm3is powered off:virsh shutdown kvm3
Unregister domain configuration from KVM:
virsh undefine kvm3
If NVRAM error occurs during undefine, append
--nvram:virsh undefine kvm3 --nvram
Delete corresponding disk image file from host filesystem:
rm KVM/kvm3.qcow2Confirm deletion by checking hypervisor inventory:
virsh list --all
2.17. Deploying a Rocky Linux Cloud Base Image#
Navigate to local
KVMworking directory:cd KVM
Convert and copy downloaded generic base image into system VM disk location:
sudo qemu-img convert -f qcow2 -O qcow2 Rocky-10-GenericCloud-Base.latest.x86_64.qcow2 /var/lib/libvirt/images/rocky10.qcow2
Provision VM
rocky10(1 vCPU core, 1024 MB RAM, UEFI boot mode):virt-install --name rocky10 --memory 1024 --vcpus 1 --os-variant rhel10-unknown --disk /var/lib/libvirt/images/rocky10.qcow2 --virt-type kvm --graphics none --import --network network=default,model=virtio --cloud-init --boot uefi
After the system boots up, disconnect from the console (
Ctrl + ]).Shutdown the VM:
virsh shutdown rocky10
Ensure VM
rocky10is powered off:virsh list --all
Set new root password directly using
virt-customize:sudo virt-customize -a /var/lib/libvirt/images/rocky10.qcow2 --root-password password:coolpass
2.18. Customizing Rocky Linux Guest Installation#
Start
rocky10instance and connect to guest console:virsh start rocky10 virsh console rocky10
Log in as user
rootusing passwordcoolpass.You will be prompted to reset the root password. Use
unisyscoolpass.Install text editor utility
nano:dnf install nano -y
Set local system hostname:
nano /etc/hostnameAdd
rocky10to file contents and save.Add administrative user
hostadm:adduser hostadm passwd hostadm
Grant administrative
sudorights by assigningwheelgroup membership:usermod -a -G wheel hostadm
Reboot system to confirm configuration persistence:
reboot
After verifying system boot and
sudoprivilege escalation for userhostadm, issue clean console shutdown command:shutdown -h now